
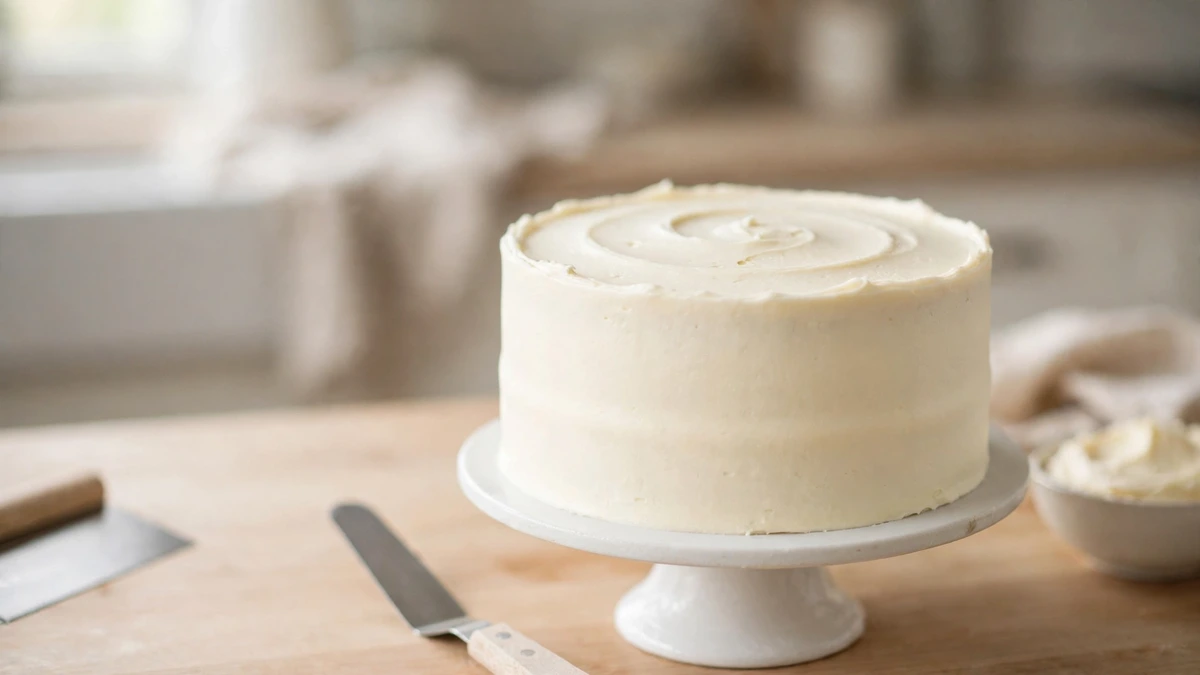
How to Frost a Cake Like a Professional: A Step-by-Step Guide for Beginners
A cake can taste wonderful but still look uneven if the frosting is lumpy, the sides show crumbs, or the layers bulge in the middle. The good news is that learning how to frost a cake does not require pastry-school training. With a cooled cake, stable frosting, a few basic tools, and a simple crumb coat, you can create a smooth, polished finish at home.
This guide walks you through how to frost a layer cake from start to finish. You will learn which tools matter, how to choose frosting, how to apply frosting to a cake, and how to fix the most common frosting problems. Smooth frosting is a skill built through repetition—not perfection on the first try.
What You Need to Frost a Cake
You do not need a full decorating kit to frost a cake well. Start with the essentials, then add optional tools only when you want to practice more advanced cake frosting techniques.
Essential tools
- Offset spatula: A small angled spatula makes it much easier to spread frosting evenly across the top and sides without dragging your knuckles through the finish.
- Cake turntable: A turntable lets you rotate the cake while keeping your spatula or scraper still. It is especially useful for smooth sides and even top edges.
- Bench scraper: This flat tool helps smooth the sides of buttercream and remove excess frosting. A large, straight-sided metal scraper works best.
- Mixing bowl and electric mixer: Use these to make frosting with a light, even texture. Hand mixing works, but an electric mixer saves time and reduces lumps.
- Cake board or sturdy serving plate: A cake board supports the bottom layer and makes moving the finished cake easier. Choose a board slightly larger than the cake.
- Measuring cups and spoons: Accurate measurements help you make frosting with dependable consistency.
Optional but helpful tools
- Piping bag and tips: Useful for borders, rosettes, shells, and simple written messages. Beginners can create a polished cake without piping at all.
- Serrated knife or cake leveler: Helps remove domes from cake layers so they stack evenly.
- Parchment paper strips: Place these under the edges of the cake before frosting; remove them afterward for a cleaner serving plate.
- Turntable with a non-slip base: Helpful if your counter is smooth or your turntable tends to slide.
- Spatula or small bowl for crumb-coat frosting: Keeping a separate portion for the crumb coat reduces the chance of transferring crumbs into your final frosting.

Choosing the Best Frosting for Your Cake
The best frosting for decorating cakes depends on the flavor, the filling, the room temperature, and the finish you want. A frosting that tastes great may not always be the easiest one to smooth.
| Frosting | Texture and sweetness | Best uses | Beginner notes |
|---|---|---|---|
| American buttercream | Thick, creamy, and sweet; usually made with butter and powdered sugar. | Birthday cakes, kids’ cakes, piped borders, colorful decorations. | One of the easiest frostings for beginners. It holds shape well but can feel very sweet. |
| Cream cheese frosting | Tangy, rich, and softer than basic buttercream. | Carrot cake, red velvet cake, spice cake, banana cake. | Delicious but softer; keep the cake chilled if the frosting becomes difficult to handle. |
| Swiss meringue buttercream | Silky, less sweet, and very smooth. | Elegant layer cakes, smooth finishes, subtle flavors. | Excellent for a professional-looking finish, but it takes more steps to make. |
| Chocolate ganache | Glossy when warm; fudgy and firm when chilled. | Chocolate cakes, drip cakes, sharp-edged finishes. | Great for clean sides, but timing matters: too warm and it runs, too cold and it is hard to spread. |
| Whipped cream frosting | Light, airy, and less sweet. | Fresh fruit cakes, summer desserts, simple rustic finishes. | Beautiful but less stable. Refrigerate the cake and serve it promptly. |
For a first layer cake, American buttercream is often the most forgiving choice. It spreads easily, holds a crumb coat well, and tolerates small mistakes better than whipped cream or very soft cream cheese frosting.
How to Prepare a Cake Before Frosting
Preparation is where most professional-looking cakes begin. Frosting a warm cake can cause buttercream to melt, whipped cream to soften, and layers to slide. Let cake layers cool completely on a wire rack before you begin.
- Cool the layers fully. Give the cakes time to reach room temperature. A warm center can soften frosting from the inside out.
- Level domed layers if needed. Use a long serrated knife or cake leveler to remove a high dome. Work slowly and keep the knife level.
- Chill layers when helpful. Chilling firm layers makes them easier to stack and less likely to shed crumbs. King Arthur Baking recommends chilling or freezing baked layers before assembling when your schedule allows. [3]
- Brush away loose crumbs. Use a clean pastry brush or your hand to remove loose crumbs from the tops and sides.
- Prepare a stable base. Put a small dab of frosting on the cake board or plate, then place the first layer on top. This helps prevent sliding.
- Check frosting consistency. Frosting should spread easily but hold its shape. If it slides off the spatula, chill it briefly; if it is stiff and tears the cake, let it soften slightly and mix it again.
How to Frost a Cake Step by Step
Below is a reliable method for how to frost a layer cake. These steps work especially well with buttercream, but the same general process applies to many frostings.
Step 1 — Secure the First Cake Layer
Place a cake board on your turntable. Spread a very thin layer of frosting in the center of the board, then set the first cake layer on top. Press gently so the layer sits flat and stable.
If your cake layers are very soft, chill them for 20 to 30 minutes first. A firmer cake is easier to handle and less likely to shed crumbs.
Step 2 — Add the Filling
Spoon filling or frosting onto the first layer and spread it evenly with an offset spatula, leaving a small border around the edge. For a standard 8- or 9-inch layer cake, about 1/2 cup of filling per layer is a useful starting point, though you can use more or less depending on taste.
If you are using a soft filling such as jam, lemon curd, fruit compote, or whipped cream, pipe a ring of stiff buttercream around the outer edge first. This “frosting dam” helps keep the filling from squeezing out when you stack the next layer.
Step 3 — Stack the Cake Layers
Add the next cake layer carefully, aligning it with the layer below. Press down very gently to remove air gaps, but do not press hard enough to squeeze out the filling.
Check the cake from eye level. If one side is higher, gently adjust the layer before moving on. For a taller cake, use a dowel or cake support structure if the layers are heavy or the filling is soft.
Step 4 — Apply the Crumb Coat
A crumb coat is a thin layer of frosting applied before the final coat. Its job is to trap loose crumbs and create a smoother base for the finished frosting.
Use a small amount of frosting and cover the top and sides in a thin, even layer. It is fine if some cake shows through. Do not worry about making this layer perfect.
Chill the crumb-coated cake until the frosting feels firm to a light touch. Many buttercream cakes need about 20 to 30 minutes in the refrigerator, though timing varies with frosting type, kitchen temperature, and cake thickness. King Arthur Baking similarly recommends chilling a crumb coat for about 20 to 30 minutes before applying the finish coat. [3]

Step 5 — Apply the Final Coat of Frosting
Once the crumb coat is firm, add a generous amount of frosting to the top of the cake. Use the offset spatula to push frosting over the edges and down the sides. Work in sections rather than trying to cover the entire cake at once.
Aim to add slightly more frosting than you think you need. Having extra frosting on the surface makes it easier to smooth without pulling against the cake.
Step 6 — Smooth the Cake Sides
Hold the bench scraper vertically against the side of the cake while slowly rotating the turntable. Keep the scraper steady and use light pressure. The goal is to remove excess frosting and create an even, smooth surface.
Do not press too hard. If the scraper removes too much frosting, add a little more and pass over the area again. Clean the scraper between passes so crumbs and frosting buildup do not create lines.
Step 7 — Smooth the Top Edge
After the sides are smooth, use an offset spatula to pull excess frosting from the outer edge of the top toward the center. Hold the spatula nearly flat and move slowly around the cake.
For a sharp top edge, chill the cake briefly after smoothing the sides, then make one final pass with the spatula from the edge toward the center. For a softer, more rustic look, simply leave a gentle swirl on top.
Step 8 — Add Simple Decorative Finishes
You do not need elaborate piping to make a cake look finished. Beginner-friendly options include:
- A piped shell or dot border around the top or bottom edge
- Chocolate shavings or curls
- Fresh berries or sliced fruit
- Sprinkles pressed gently around the base
- A textured pattern made with the back of a spoon or a cake comb
- A simple dusting of cocoa powder, cinnamon, or powdered sugar
Choose decorations that match the cake’s flavor and occasion. A smooth, neatly frosted cake can look just as impressive as a heavily decorated one.
How to Get Smooth Frosting on a Cake
Knowing how to get smooth frosting on a cake comes down to consistency, temperature, and restraint. Smooth frosting is easier to achieve when the cake is stable and the frosting is neither too soft nor too stiff.
- Get the consistency right. Buttercream should hold a peak but spread easily. If it is too stiff, add a small amount of milk or cream, 1 teaspoon at a time. If it is too soft, chill it briefly and mix again.
- Use enough frosting. A thin final coat forces the spatula against the cake and can pull up crumbs. Add enough frosting to glide over the surface.
- Rotate, don’t chase. Let the turntable do the moving. Keep your spatula or scraper in one steady position instead of moving it around the cake.
- Avoid overworking it. Repeated passes can warm buttercream, incorporate air, and create rough texture. Make a few deliberate passes, then stop.
- Clean your tools. Wipe the bench scraper and spatula between passes to prevent streaks and crumb transfer.
- Watch the room temperature. A very warm kitchen can soften buttercream quickly. If the frosting begins to look shiny or slack, chill the cake for 10 to 15 minutes.
- Use gentle heat only when appropriate. A warm, clean spatula can smooth some buttercreams, but heat can melt whipped cream, soften cream cheese frosting, or make ganache too fluid. Test on a small area first.
Different frostings respond differently. Swiss meringue buttercream often becomes exceptionally smooth with a metal scraper, while American buttercream may show small air bubbles. Ganache needs precise temperature control, and whipped cream is best kept simple and served soon after decorating.
Common Cake Frosting Mistakes and How to Fix Them
Most frosting problems can be improved. Use this table to identify the likely cause and choose the best solution.
| Problem | Likely cause | Solution |
|---|---|---|
| Crumbs appear in the frosting | The cake was too warm, too crumbly, or the final coat was applied too thinly. | Chill the cake, apply or repair the crumb coat, then add a thicker final coat with a clean spatula. |
| Frosting tears or pulls away from the cake | The frosting is too stiff or the cake surface is dry. | Soften the frosting slightly, mix until smooth, and apply a thin layer of frosting or simple syrup to hydrate the surface before continuing. |
| Uneven or bulging layers | Too much filling, uneven cake layers, or filling that was not contained. | Level the layers, use less filling, and pipe a frosting dam around soft fillings before stacking. |
| Frosting is too soft | The kitchen is warm, the butter was too soft, or the frosting has too much liquid. | Refrigerate the frosting for 10 to 20 minutes, then re-whip briefly. Add more powdered sugar only if needed for buttercream. |
| Frosting is too stiff | Too much powdered sugar, cold butter, or not enough liquid. | Let it sit at room temperature briefly, then mix. Add milk or cream 1 teaspoon at a time until it spreads smoothly. |
| Visible spatula marks | The frosting is drying or setting while you work, or the tool is dragging. | Work in smaller sections, keep the tool clean, and use light pressure. For buttercream, a final smooth pass with a clean scraper can help. |
| The cake leans or slides | Layers are uneven, the filling is too soft, or the cake was not secured to the board. | Chill the cake, press gently to realign it, and use frosting dams or dowels for tall or heavily filled cakes. |
| Frosting looks grainy or separated | The ingredients were at different temperatures, or the frosting was overmixed or overheated. | For buttercream, mix slowly for several minutes; gently warm or cool as appropriate for the frosting type. For meringue buttercream, re-whip until it comes back together. |
| The cake sweats after refrigeration | Condensation forms when a cold cake meets warm, humid air. | Let the cake sit briefly at room temperature before serving and avoid touching the surface while condensation evaporates. |
How to Frost Different Types of Cakes
The basic method stays the same, but cake structure and frosting stability change how you should work.
- Single-layer cake: Frost the top and sides directly. A crumb coat is still helpful, especially for tender or crumbly cakes.
- Two-layer birthday cake: Use an even filling layer, apply a crumb coat, chill, then finish with a smooth coat of buttercream. This is one of the easiest cakes for beginners to decorate.
- Tall layer cake: Keep filling layers thin and use a frosting dam. For cakes with several layers, consider dowels or a central support to prevent shifting.
- Chocolate cake: Chocolate cakes can be more delicate and crumbly. A well-chilled crumb coat is especially useful before applying chocolate buttercream or ganache.
- Delicate sponge cake: Handle gently and avoid pressing down on the layers. A light syrup can moisten the surface, but use only a small amount so the cake does not become soggy.
- Sheet cake: Frost the cooled cake directly in the pan or on a large board. Use long, light strokes with an offset spatula and focus on an even top layer.
How Much Frosting Do You Need?
Frosting amounts vary with layer height, filling thickness, decoration style, and how thickly you frost the sides. The estimates below are practical starting points for a two-layer cake with a moderate filling and a smooth finish.
| Cake size | Approximate frosting for filling and crumb coat | Approximate total frosting for a smooth finish |
|---|---|---|
| 6-inch two-layer cake | About 1 cup | About 2 1/2 to 3 cups |
| 8-inch two-layer cake | About 1 1/2 cups | About 3 1/2 to 4 1/2 cups |
| 9-inch two-layer cake | About 1 3/4 cups | About 4 to 5 cups |
If you plan to pipe borders, add a textured finish, or use a thick filling, make a little extra frosting. Running short midway through decorating is more inconvenient than having a small amount left over.
How to Store a Frosted Cake Safely
Storage depends on the frosting, filling, and room temperature. Cakes made with whipped cream, custard, fresh fruit, mascarpone, or other perishable ingredients should be refrigerated. Keep your refrigerator at 40°F or below, and follow the two-hour rule for perishable foods: refrigerate within two hours, or within one hour if the room is above 90°F. [20][16]
- Buttercream cakes: Many buttercream cakes can be kept covered at cool room temperature for a short time, but refrigerate them if the kitchen is warm, the filling is perishable, or you need to store the cake longer.
- Cream cheese and whipped cream cakes: Refrigerate these cakes. Return them to the refrigerator promptly after serving.
- Cover without damaging the finish: Chill the cake until the frosting is firm, then loosely cover it with a cake carrier, large bowl, or tented plastic wrap. Avoid pressing wrap directly into soft frosting.
- Before serving: If refrigerated, let the cake sit at room temperature for a short time so the frosting and crumb soften slightly. Avoid leaving perishable cakes out for extended periods.
When in doubt, refrigerate the cake—especially if it contains dairy-based frosting, custard, fresh fruit, or whipped cream. The USDA advises discarding perishable food left in the 40°F to 140°F “Danger Zone” for more than two hours, or one hour above 90°F. [19]
Frequently Asked Questions
Should a cake be cold before frosting?
The cake should be completely cool, but it does not need to be ice-cold. Chilling layers for 20 to 30 minutes can make them firmer, easier to stack, and less likely to shed crumbs. Avoid frosting a warm cake, because heat can soften the frosting and cause layers to shift.
What is a crumb coat, and is it necessary?
A crumb coat is a thin layer of frosting applied before the final coat. It traps loose crumbs and creates a smoother base. It is not always required, but it is highly recommended for layer cakes, chocolate cakes, and any cake with a delicate or crumbly texture.
How much frosting do I need for an 8-inch cake?
For a standard 8-inch two-layer cake, plan on roughly 3 1/2 to 4 1/2 cups of frosting for filling, a crumb coat, and a smooth final coat. Use more if you prefer thick frosting, tall layers, piped decorations, or a heavily filled cake.
How do I get perfectly smooth frosting?
Use frosting with the right consistency, apply enough to cover the cake freely, and smooth the sides with a clean bench scraper while rotating the turntable. Make only a few passes, clean your tools often, and chill the cake briefly if the frosting becomes too soft.
Can I frost a cake the day before serving?
Yes, in many cases. Buttercream cakes often hold up well when made a day ahead and stored properly. If the frosting or filling is perishable, refrigerate the cake and protect the surface from absorbing refrigerator odors or moisture.
Why does my frosting pull crumbs off the cake?
This usually happens when the cake is warm, dry, or crumbly, or when too little frosting is used. Chill the cake, brush away loose crumbs, apply a thin crumb coat, and use a generous final layer of frosting with a light touch.
Which frosting is easiest for beginners?
American buttercream is usually the easiest. It is simple to make, spreads well, holds its shape, and is forgiving if you need to re-smooth an area. It is especially good for practicing crumb coats and basic cake decorating.
Do I need a turntable to frost a cake?
No. You can frost a cake on a sturdy plate or board, but a turntable makes the process easier. It helps you apply frosting evenly and smooth the sides without walking around the cake or constantly repositioning your spatula.
How long should a crumb coat chill?
For many buttercream cakes, 20 to 30 minutes in the refrigerator is enough. The crumb coat is ready when it feels firm to a gentle touch and does not smear easily. Timing varies with frosting type and kitchen temperature.
Can I frost a cake without an offset spatula?
Yes. A butter knife, silicone spatula, or the back of a spoon can work in a pinch. An offset spatula simply gives you more control, especially when spreading the top and smoothing the sides of a layer cake.
Final Tips for Professional-Looking Cake Frosting
The biggest differences between a homemade-looking cake and a polished one are usually preparation and patience. Cool the layers completely, use stable frosting, apply a crumb coat, add enough frosting for the final coat, and smooth with light pressure.
Do not chase perfection on your first cake. Practice with a simple two-layer cake, take your time with the crumb coat, and remember that a few small imperfections are part of homemade baking. For more ideas, explore Cake-Flavors.com’s cake recipes, frosting guides, and beginner decorating tutorials.